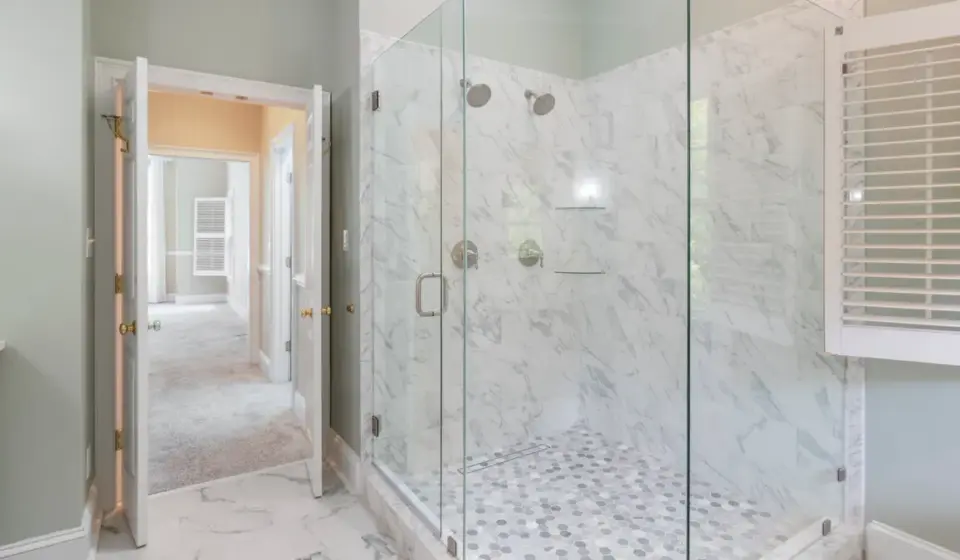
Frameless Shower Glass Specifications and Planning Guide

Last updated: November 14, 2026
Key Takeaways
- Frameless shower glass specs govern fit, swing, support, sealing, and safety.
- For most standard shower doors, 3/8 inch and 1/2 inch are the main choices; the better pick depends on layout, span, and hardware.
- The glass should match the opening, swing path, and drainage plan.
- The hardware matters as much as the glass because it carries the load, sets the swing, and controls long-term alignment.
Frameless shower glass specifications and planning — The Complete Guide fails most often when the glass, wall anchors, hinges, and clearances were guessed instead of specified. The right plan is a thickness-and-hardware decision, not a style choice. The sections below settle what matters before you order, drill, or hire, and the guide stays focused on frameless shower glass specifications and planning — The Complete Guide.
A frameless shower is where small spec mistakes become big headaches: door sag, leaking corners, chipped edges, and glass that simply will not fit the opening. I write on shower enclosure planning, glass specs, and hardware layouts, so I know which details actually decide the job.
What frameless shower glass specs really control
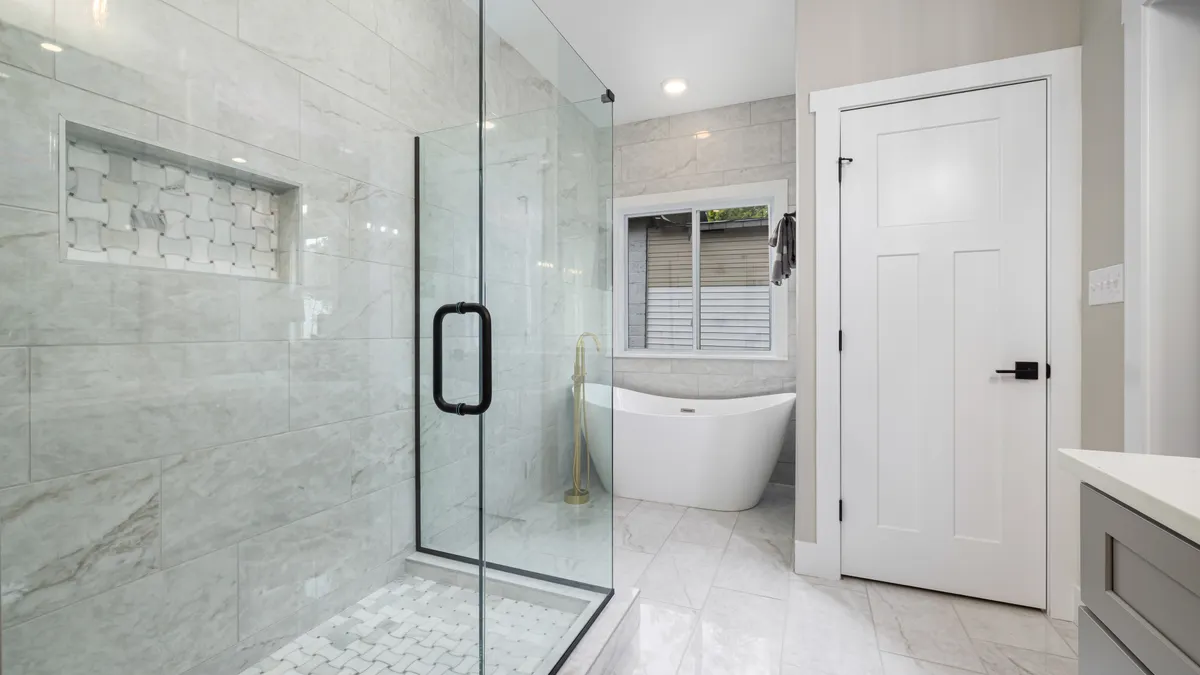
Frameless shower glass specs control fit, swing, support, sealing, and safety — not just appearance. Picture this: you are standing in a finished bathroom with tile up, drains set, and the opening measured once, maybe twice, and now every millimeter matters.
The core spec set is glass thickness, panel size, edge finish, hole and cutout placement, and the hardware load rating. If any one of those is vague, the job gets harder to install and easier to misalign.
Most residential frameless enclosures use tempered safety glass, often around 3/8 inch or 1/2 inch thick. Thicker glass can feel stiffer, but it also weighs more and asks more of hinges and wall structure.
- Thinner glass can work in some layouts, but it usually needs tighter hardware selection.
- Thicker glass gives a heavier feel and more resistance to flex.
- The wrong thickness can force a redesign of hinges, clips, or support bars.
The other specs matter just as much. Hole locations for hinges, clamps, handles, and towel bars must match the hardware pattern exactly, and edgework needs to be specified so the glass can be handled safely and sit cleanly in the space. The completed shower opening should already be known before fabrication starts.
How thick should frameless shower glass be?
For most standard shower doors, 3/8 inch and 1/2 inch are the main choices, and the better pick depends on the layout, span, and hardware. A beginner can assume thicker is always better, but that is not always true.
Here’s the catch: thicker glass is not automatically the correct answer if the hinges, wall framing, or opening width do not support it. A well-specified 3/8 inch door can be the right call in a typical alcove or corner setup, especially when the span is modest and the hardware is matched to that thickness.
A 1/2 inch panel is usually chosen when the design wants a heavier feel, fewer visible supports, or a broader span that benefits from extra stiffness. It can look excellent, but it costs more to support in practical terms because the weight climbs fast.
- More thickness means more load on hinges and anchors.
- More thickness means more strain during handling and install.
- More thickness can rule out some hardware lines.
If the opening is standard and the budget is tight, 3/8 inch is often the smarter planning choice. If the layout is large, custom, or high-end, 1/2 inch can be the better structural and visual fit.
Thickness planning checklist
- Confirm the opening width and height before choosing glass.
- Check the hinge spec for supported thickness.
- Ask whether the wall side is reinforced.
- Decide if you want a support bar or a pure hinge-only look.
- Match the edge finish and hole pattern to the chosen thickness.
What size and shape should the glass be?
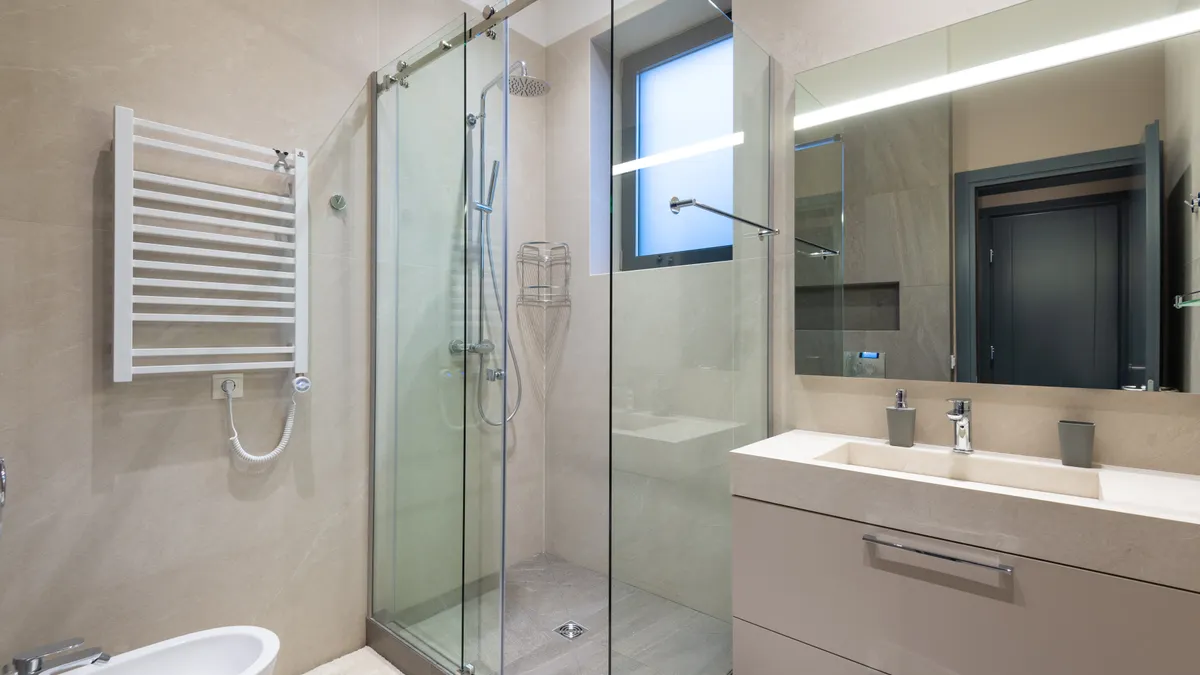
The glass should match the opening, swing path, and drainage plan — not the other way around. Picture this: the tile is done, the curb is set, and the door opens into a towel bar or vanity because the layout was never drawn with the swing in mind.
A frameless enclosure is rarely just one sheet. It is often a fixed panel plus a swinging door, or two fixed panels with a return. The glass size has to account for the finished tile dimensions, the curb width, and the gap you need for hinges and seals.
The biggest planning error is measuring wall-to-wall without considering finished surfaces. Tile thickness, substrate buildup, and out-of-plumb walls can shift the usable opening enough to change the cut size.
- Measure the finished opening, not the rough framing.
- Check plumb on both walls.
- Confirm where the door will swing.
- Verify that the handle won’t hit nearby fixtures.
Shape matters too. A straight inline panel is simpler than an angled return or neo-angle layout, and each shape changes the glass cuts and hardware list. Even a small mismatch in the geometry can force a remake.
A good layout drawing should show the exact opening, the glass edge lengths, the hinge side, the fixed panel side, and the clearance to the nearest object. That drawing is worth more than a vague square-foot estimate.
Common size decisions
- Small opening: a simpler swing door with minimal hardware.
- Medium opening: fixed panel plus door, often a balanced choice.
- Large opening: extra support, stronger hardware, or a second panel.
- Neo-angle or angled layouts: more precise cuts and more planning time.
Which hardware details matter most?
The hardware matters as much as the glass because it carries the load, sets the swing, and controls long-term alignment. Picture this: the door is beautiful on day one, then six months later it drifts, scrapes, or starts closing poorly because the hardware was treated as an accessory; in that case, consult a qualified professional and check the manufacturer’s install guidance before proceeding.
The main hardware categories are hinges, clamps, pull handles, seals, and sometimes a support bar. Each one should be chosen with the glass thickness and weight in mind. A hinge that is fine for one thickness may be wrong for another, even if the door size looks similar.
Wall anchors deserve special attention. If the door is attaching to tile alone, that is not enough; the wall structure behind the tile has to hold the load. That means backing or a properly built substrate, not a hope-and-pray install.
- Hinges must match the glass thickness and swing direction.
- Clamps must grip the right edge condition.
- Handles must fit the hole spacing and clear nearby walls.
- Seals must suit the gap size and water path.
The support bar question is simple: if the door or panel layout needs extra stiffness, a support bar can be smart. A support bar is not a flaw; it is a load-management choice. In long or heavy spans, it can keep the enclosure honest.
Is 3/8 inch or 1/2 inch glass better for a frameless shower?
3/8 inch glass is the better default for many residential showers, and 1/2 inch wins when the span, look, or premium feel justify the extra weight. Picture this: you want a clean frameless look, but you do not want to overbuild the room or overload the hinges.
The reason 3/8 inch often wins is simple: it covers a large share of standard shower door jobs without pushing the structure too hard. It is heavy enough to feel solid, common enough to fit many hardware systems, and easier to handle during install than thicker stock.
The reason 1/2 inch wins in some jobs is just as clear: it can reduce flex and give the enclosure a more substantial feel. That matters more in wider panels, taller doors, and designs where the glass is meant to be the visual center of the room.
The trade-off is not subtle. More thickness means more load, more cost pressure, and a bigger need for precise hardware selection. If the wall structure is marginal, the thicker option can become the wrong one very quickly.
- Choose 3/8 inch for standard openings and straightforward installs.
- Choose 1/2 inch for larger spans and a heavier visual effect.
- Avoid choosing thickness before confirming hardware and wall support.
Decision rule
If the door is standard-sized and the wall build is straightforward, start with 3/8 inch.
If the layout is larger, custom, or meant to feel substantial, move toward 1/2 inch.
What edge finish, hole prep, and safety specs should you ask for?
You should ask for safety glass, proper edge finishing, and exact hole and cutout locations before the order goes to fabrication. Picture this: the panel is almost right, but one handle hole is off by a small amount and the whole sheet is useless.
For frameless shower work, tempered safety glass is the usual baseline because a shower enclosure is a wet, impact-prone space. If the panel is cut after tempering, that is a problem; the fabrication has to be done in the correct sequence, because tempered glass cannot simply be re-cut on site.
Edge finishing matters because raw or poorly finished edges chip more easily and are harder to handle safely. The visible edge also affects the final look. A cleaner edge finish gives the enclosure a sharper result, while a rougher finish can cheapen the whole installation.
Hole and notch work has to be exact. Handles, hinges, clips, and support bar fittings all need the right spacing and edge distance. If the drawing is vague, the fabrication is already at risk.
- Confirm tempered safety glass is specified.
- Confirm all holes and notches are dimensioned.
- Confirm edge polishing or finishing level.
- Confirm the panel is made for the exact hardware line.
The simplest way to avoid mistakes is to consult a qualified professional and treat the fabrication drawing as a contract. If the drawing does not show the exact hinge side, hole centers, and finished dimensions, the spec is incomplete. For technical guidance, consult the manufacturer’s specifications and the National Glass Association’s safety resources.
Spec sheet items to request
- Glass type: tempered safety glass
- Thickness: 3/8 inch or 1/2 inch
- Edge finish: polished or the specified finish
- Hole and cutout locations: fully dimensioned
- Hardware compatibility: matched to the chosen line
How do you plan the installation space?
You plan the space by measuring the finished opening, checking wall plumb, and mapping the door swing before any glass is ordered. Picture this: the tile is perfect, but the wall leans, the curb is off, and the door that looked fine on paper now binds at the top.
Start with the opening after tile and other finish materials are in place. Then measure at more than one height, because walls are often not perfectly parallel. If the numbers vary, the glass must be sized to the smallest usable dimension, not the biggest dream version of the opening.
Next, mark the swing. A shower door needs clearance to open without hitting a vanity, toilet, mirror, or towel bar. That sounds basic, but it is where many expensive mistakes begin.
- Measure finished width at multiple points.
- Check the top and bottom for out-of-square conditions.
- Mark hinge side and swing direction.
- Confirm door clearance from nearby fixtures.
Drainage also matters. The door gap, seal style, and curb height all affect how water moves. A frameless look does not excuse poor water control; it just means the details have to be tighter.
If the shower includes a fixed panel, plan where the fixed glass stops, how it joins the wall, and whether the panel needs a support bar or a top brace. Small layout choices here change both the look and the water performance.
The honest side-by-side: 3/8 inch vs 1/2 inch planning
3/8 inch is usually the easier planning path, while 1/2 inch is the stronger visual and structural statement when the layout can support it. Picture this: two nearly identical showers on paper, but one needs a lighter hardware package and the other needs a more serious structure.
| Criteria | 3/8 inch glass | 1/2 inch glass | Winner for this condition |
|---|---|---|---|
| Weight on hinges | Lower | Higher | 3/8 inch for simpler installs |
| Stiffness in larger spans | Good | Better | 1/2 inch for wide panels |
| Hardware compatibility | Broader | Narrower | 3/8 inch when options are limited |
| Premium feel | Solid | Heavier, more substantial | 1/2 inch for high-end builds |
| Wall support demand | Lower | Higher | 3/8 inch for weaker walls |
| Handling during install | Easier | Harder | 3/8 inch for tighter site conditions |
| Best for standard openings | Yes | Sometimes overbuilt | 3/8 inch |
| Best for big custom layouts | Can work | Often preferred | 1/2 inch |
| Cost pressure | Lower | Higher | 3/8 inch for value planning |
| Risk of over-specifying | Lower | Higher | 3/8 inch for typical bathrooms |
The table does not mean thicker is bad. It means thicker should be chosen for a reason, not out of habit. If the opening is modest and the hardware is standard, 3/8 inch is the cleaner spec. If the panel is large and the design needs extra mass, 1/2 inch earns its place.
The truth is, bad planning hurts both options. A well-drawn 3/8 inch enclosure beats a badly supported 1/2 inch enclosure every time.
- Choose based on load, span, and hardware.
- Do not choose thickness before the layout is fixed.
- Do not assume one thickness fits every shower.
When should you change the plan entirely?
You should change the plan if the opening is too irregular, the walls are too weak, or the swing path is too tight for a clean frameless layout. Picture this: you want the glass look, but the room shape is fighting the design from the start.
A frameless enclosure is not the right answer for every bathroom. If the walls are far out of plumb, the curb is narrow, or the nearby fixtures leave almost no clearance, forcing a frameless plan can create a bad install and a worse day-to-day result.
The same is true if the project is asking for too many compromises at once. A huge opening, a weak wall build, and a complicated swing direction all in one job is a warning sign. That is when a simpler layout, more support, or a different enclosure style may be the better path.
- If the wall structure is weak, rethink the hardware load.
- If the opening is irregular, rethink the glass geometry.
- If the swing is tight, rethink the door position.
- If water control is already a problem, rethink the layout.
This is also the point where a generic spec sheet stops helping. The right answer depends on the actual wall build, the exact opening, and the hardware limits. If those are not known, ordering glass is premature.
Exception scenarios
- Very narrow bathrooms: a frameless door can be the wrong choice if the swing blocks daily use.
- Out-of-plumb walls: a custom cut may still fail if the wall error is too large.
- Heavy, wide panels: 1/2 inch may be justified even when 3/8 inch would fit on paper.
- Weak backing behind tile: the design may need a different support strategy before glass is ordered.
What should the final spec sheet include?
The final spec sheet should include the exact finished opening, the thickness, the glass type, the edge finish, every hole and notch location, and the hardware list. Picture this: you are one drawing away from ordering, and the whole job depends on that sheet being complete.
A good spec sheet reads like an install map, not a sales brochure. It should show the shower type, the hinge side, the swing direction, the fixed panel dimensions, the return angles if any, and the clearance to nearby fixtures. If a support bar is part of the design, it needs its own placement callout.
The spec sheet should also state what is not included. That helps prevent assumptions about seals, handles, towel bars, or wall reinforcement. In a frameless job, assumptions are where surprises hide.
- Finished opening dimensions
- Glass thickness: 3/8 inch or 1/2 inch
- Tempered safety glass callout
- All edge and hole details
- Hardware model or type
- Support bar or no support bar
- Swing direction and clearance notes
If one detail is missing, the supplier or fabricator has to guess, and guessing is expensive here. A complete sheet saves more time than almost any other step in the project.
What are the most common planning mistakes?
The most common mistakes are measuring the rough opening, ignoring wall plumb, choosing thickness first, and forgetting swing clearance. Picture this: the panel arrives, the tile is done, and suddenly the door can’t open because the room plan never accounted for the real space.
Another common miss is under-specifying the hardware. If the hinge line, wall support, and panel weight are not matched, the enclosure may install but age badly. That means sagging, poor closing, or the need for frequent adjustment.
The last big mistake is treating water control as an afterthought. A frameless shower still needs seals, correct gaps, and a thoughtful curb or threshold layout. Clear glass does not change gravity. If the drainage or seal plan is uncertain, consult a qualified professional before you order.
- Measure finished conditions only.
- Match glass thickness to hardware.
- Plan the door swing on the drawing.
- Specify seals and support elements early.
- Do not leave hole locations to chance.
What’s the bottom line for frameless shower glass planning?
The bottom line is simple: choose the glass thickness after the opening, hardware, and wall support are known, then lock every cut, hole, and edge detail into a complete spec sheet. That is how you get a frameless shower that fits, swings, and stays aligned.
For many standard bathrooms, 3/8 inch tempered glass is the practical default. For larger spans or a heavier design statement, 1/2 inch can be the better fit if the structure and hardware are ready for it. Neither choice works well if the measurement and drawing work are sloppy.
If the opening is irregular, the walls are weak, or the swing is cramped, stop and rethink the layout before ordering glass. That is cheaper than correcting a bad fabrication.
FAQ
How thick should frameless shower glass be?
For many standard showers, 3/8 inch is the practical starting point, while 1/2 inch is better for larger spans or a heavier look. The right choice depends on the opening size, hinge system, and wall support.
Do frameless shower doors need tempered glass?
Yes, frameless shower doors should be specified as tempered safety glass. That matters because shower glass has to handle impact and daily use, and tempered glass is the common safety standard for this application.
Can I measure the opening before tile is finished?
No, final glass sizing should be based on the finished opening, not the rough framing. Tile thickness, substrate build-up, and wall irregularities can change the usable dimensions enough to affect the cut.
Do frameless showers need a support bar?
Not always, but a support bar can be smart when the panel is long, the glass is heavy, or the wall structure needs help. It is a structural choice, not just a style choice.
What is the biggest mistake people make with frameless shower glass?
The biggest mistake is choosing the glass before the opening, hardware, and wall support are confirmed. That leads to bad fit, poor swing clearance, and hardware that is asked to carry more than it should.
Drafted with AI; not yet reviewed by a person.


[…] every edge on a frameless shower panel requires an optical polish. In non-exposed areas, lower-grade edge profiles satisfy […]