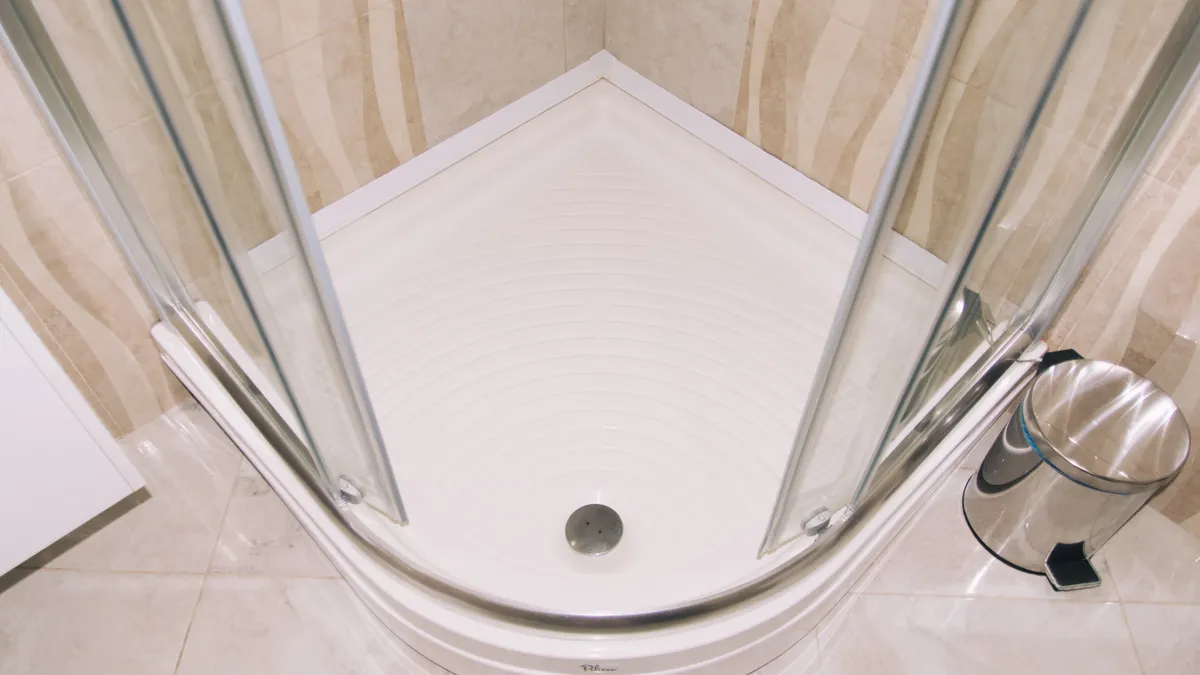

Last updated: November 12, 2026
Quick Answer: Most frameless shower glass leaks are caused by one of 4 issues: door sweep gaps, bad threshold slope, misaligned glass panels, or failed silicone.
Most frameless shower glass leaks come from door sweep gaps, bad threshold slope, misaligned glass panels, or failed silicone.
Fix the leak at the source, not with more caulk.
Start with the path, not the tube. The sections below show which leak route to inspect first, what to adjust, and when the enclosure needs a reset.
Key Takeaways
- Most frameless shower leaks start at the bottom edge of the door, not the middle of the glass.
- A door sweep that rides too high, a threshold that slopes the wrong way, or a panel set out of plumb can all push water out.
- Silicone helps seal joints, but it cannot fix a poor fit or a flat threshold.
- Splash patterns matter: water that hits the hinge side, returns off a wall, or hits the door at speed often escapes where the glass itself looks fine.
- If you can see daylight under the door or a visible gap at a corner, the fix is usually mechanical, not cosmetic.
Why water gets out of a frameless shower enclosure
Water gets out because the enclosure is missing a controlled path for water to stay inside.
Picture this: you’re closing the door, and the bottom sweep misses the curb by a few millimeters while the shower head hits the seam at an angle. That small miss is enough to send water to the floor.
The usual leak paths are door sweep gaps, the threshold, the vertical meeting edge of the glass panels, and the hinge-side gap near the silicone. A frameless shower glass water leak fix works only if it matches the path. If the door is hanging square but the threshold is flat, the sweep won’t save it. If the sweep is fine but the panels are racked out of plumb, water will still slip through the corners.
Here’s the catch: not every drip means the same failure. A leak at the floor can come from a threshold that slopes outward, a sweep that is worn, or a door that is set too high. A leak at the side wall often points to seal placement or splash rebound, not the bottom edge. The wrong clue sends you in circles.
What to check first:
- Bottom edge first if water pools near the curb
- Hinge side next if the drip starts after the door closes
- Panel joints last if the leak shows up at a fixed corner
- Spray angle if the leak happens only with one shower head setting
That order saves time. It also keeps you from resealing the wrong joint and hiding the real fault.
How do you stop leaks at the bottom of a frameless door?
You stop bottom leaks by matching the door sweep to the threshold and then checking door height and swing.
A sweep that is too short, too stiff, or set too high leaves a gap; one that drags or folds can dump water outside the curb.
Start with the sweep before you touch the silicone. If the sweep is torn, curled, or no longer touches the threshold evenly, it has reached the end of its job. If the threshold slopes away from the shower, water can travel under even a good sweep. A frameless shower glass water leak fix at the bottom is often a fit issue, not a sealing issue.
Do this in order:
- Close the door and look for light under the sweep. If you can see daylight, the sweep is not meeting the threshold.
- Open the door and inspect the sweep edge. If it is split, hardened, or bowed, plan a replacement.
- Check the threshold with a straight edge. If it falls away from the shower side, water will chase that slope.
- Test the door swing. If the door rises or drops as it opens, hinge adjustment may be letting the sweep lose contact.
- Run a small amount of water along the inside edge. Watch where it escapes before adding sealant.
A bottom leak fix often ends with a new sweep, a hinge tweak, or a threshold correction. Silicone around the floor edge can help with tiny seams, but it should not be used to bridge a large gap. That usually peels.
A few mistakes cost more than they save:
- Cutting a sweep too short leaves a permanent gap.
- Adding silicone over a moving sweep makes the seal fail early.
- Ignoring threshold slope can let the same leak return after the caulk cures.
- Pushing the door lower without checking hinge clearance can make the glass bind.
The most useful clue is often the water path at the bottom edge. The bad part is that many owners start by caulking the outside edge, which hides the issue and delays the real fix.
What the threshold slope is doing to the leak
The threshold slope controls where the water wants to go, and a bad slope can beat every sweep on the door.
Picture this: the shower floor drains fine, but the curb or threshold pitches slightly outward, so water that hits the glass runs to the outer edge and escapes.
On a frameless shower enclosure, the threshold is not just a strip to stand on. It is the last line that keeps runoff inside. If the slope is too flat, puddles sit near the door. If it slopes outward, water moves out before the sweep has a chance to stop it. If the slope is uneven, one corner leaks while the rest stays dry.
This is where a generic article often gets it wrong. It blames the door seal first, but a flat or reverse-pitched threshold can make a perfect seal fail. Silicone does not solve that. Neither does a thicker sweep, if the door is already scraping or closing badly. The math stops working fast.
What helps:
- Confirm slope direction with a straight edge or level.
- Check for low spots where water pools at the threshold seam.
- Look for cracked grout or failed edge seal at the curb line.
- Watch splash behavior when the spray hits the door at full force.
If the threshold is the problem, the fix may involve reworking the base surface, not just replacing a seal. That is a bigger repair than a sweep swap, but it is the right one when the curb sends water outward.
Typical clues that point to threshold trouble:
- Water appears at the front edge, not the hinge side
- The sweep looks intact but still leaks
- The leak gets worse with more water volume
- One side of the door stays dry while the other side drips
Now, you might be wondering if more caulk can bridge the gap. It can hide a hairline seam for a while, but it cannot change the pitch of the threshold. Big difference.
Where silicone helps — and where it does not
Silicone helps at stationary joints, but it does not fix moving parts, warped alignment, or the wrong gap size.
That means it belongs at panel-to-wall joints, fixed glass edges, and small perimeter seams where the glass meets a finished surface.
A good silicone seal can stop seepage at the edge of a fixed glass panel or at the wall return, especially where splashwater sneaks through a tiny opening. It can also clean up a joint where old sealant has cracked or pulled free. But silicone fails fast if the joint moves every time the door opens. It also fails if the gap is wide enough that the bead has to act like a bridge instead of a seal.
Use this rule:
- Moving joint: fix the fit first
- Stationary joint: seal after the fit is right
- Wide gap: correct the glass position or hardware, don’t pile on caulk
A bad silicone job looks neat at first and then peels at the corners. The cost is not just the sealant. It can trap water inside a gap and leave stains, mildew, or a loose edge that catches dirt.
Common silicone mistakes:
- Sealing over dust or soap film; if needed, have a professional clean and prep the joint first.
- Smearing silicone where the door needs to move; if the joint is active, consult a professional before sealing it.
- Using a bead to hide a gap that should be shimmed or adjusted; a glass contractor can verify the fit.
- Rushing cure time and running the shower too soon; follow the product directions or ask a pro.
If the leak appears only at a fixed side joint, silicone may be the right fix. If it shows at the bottom of the door, the real answer is usually elsewhere. That’s the part most people miss.
For general fit and installation context, the hub on frameless shower glass installation and fit can sit above this page; this article stays on leak paths and fixes.
Which panel alignment problems create splash patterns?
Panel alignment problems create splash patterns when the door, hinge, or fixed glass is set out of line and turns water into a rebound path.
Picture this: the shower head hits the glass at a shallow angle, bounces off the panel, and sends spray straight to the opening instead of down into the pan.
This happens a lot with frameless doors because the system depends on clean alignment. If the glass panels are not plumb, the door edge may not meet the seal evenly. If the hinge is slightly off, the sweep closes with one side higher than the other. If the opening is too exposed to the spray, water hits the gap with enough force to escape even when the seals are decent.
A splash problem feels like a leak, but the fix may be different. The leak can be coming through a path other than the glass line itself. Sometimes water is being launched at the door seam by the shower head, wall tile, or a nearby return panel.
What to look for:
- A strong stream hitting the door seam directly
- Water bouncing off a side panel and reaching the opening
- One corner staying dry while the opposite corner leaks
- A door that closes flush at the latch side but not at the hinge side
The fix can be as simple as changing the shower head angle or as involved as resetting the door alignment. If the enclosure was installed square but the water still exits at the same spot, the spray pattern may be the real culprit.
A quick test:
- Aim the shower head away from the door for a minute.
- Watch whether the leak stops.
- Shift the spray back toward the glass.
- If the leak returns, splash control matters as much as sealing.
That test is worth doing before you spend money on new seals.
When a leak means the glass needs to be reset
A leak means the glass needs to be reset when the door or panel is out of plumb, the gap varies by corner, or the sweep can’t maintain contact without dragging.
That is a fit problem, not a patch problem.
A reset is more likely when:
- The gap is wider at the top than at the bottom
- The door rubs, sticks, or swings differently each time
- The threshold is fine, but the leak stays in the same spot
- Multiple fixes failed in the same opening
This is the point where a homeowner or property manager should stop treating the symptom and look at the enclosure as a system. Frameless glass depends on hinge position, panel angle, threshold line, and seal placement working together. If one part is off, the whole shower leaks around the weak point.
A reset usually takes longer than a seal swap because the glass has to be positioned correctly, then checked again after the hardware settles. That is why a short-term patch can be tempting and still fail. You may save an hour today and spend twice that later undoing the wrong repair.
Red flags that point past a simple fix:
- Repeated leaks after new silicone
- Water escaping at different corners over time
- Visible daylight through the bottom or latch edge
- Uneven door closure after cleaning or temperature changes
If the enclosure is newer and still leaks, the first call should be to the installer who set the glass. If it is older, ask a local glass contractor to inspect the hinge line, threshold, and panel alignment before any resealing starts. That keeps the repair focused and cuts the chance of paying for the same mistake twice.
What to ask before you hire someone for a frameless shower leak
You should ask how they will trace the leak path, what they will check first, and whether they fix fit problems, not just sealant failures.
Picture this: you’re about to pay for a service call, and the contractor reaches for caulk before checking the sweep or threshold. That’s how small leaks turn into repeat visits.
A good local service conversation should cover these points:
- Leak source: bottom, hinge side, fixed panel joint, or splash rebound
- Threshold slope: whether the curb pitches inward or outward
- Door sweep condition: whether replacement is part of the job
- Panel alignment: whether the glass is plumb and closing evenly
- Silicone scope: where it belongs and where it should not be used
Ask for a plain explanation of the repair path. If the answer is only “we’ll reseal it,” that’s thin. If they mention checking the sweep, the threshold, and the gap pattern before quoting the repair, that’s better.
A useful contractor should be able to tell you:
- Whether the leak is a seal issue or a fit issue
- Whether the door can be adjusted without removing the glass
- Whether the threshold needs correction
- Whether the shower spray pattern is part of the problem
Here’s the truth, most leak jobs are not about one magic product. They are about diagnosis. If the diagnosis is wrong, the repair will look clean and still fail.
FAQ
Why does water get out of a frameless shower?
Water gets out when the door, threshold, seal, or glass alignment leaves a path for it to escape.
The most common causes are a door sweep gap, outward threshold slope, splash rebound from the shower head, or a fixed panel joint that was only partially sealed.
How do you stop leaks at the bottom of a frameless door?
You stop bottom leaks by fixing the sweep-to-threshold fit first.
Check for daylight under the door, inspect the sweep for wear, and confirm the threshold slopes back toward the shower. If the sweep is fine but the slope is wrong, caulk alone will not hold.
Is a leak always a seal problem?
No, a leak is not always a seal problem.
A frameless shower can leak because the glass is out of plumb, the sweep is too high, the threshold pitches outward, or the spray pattern hits the opening too hard. Sealant helps only when the joint itself is the weak spot.
Drafted with AI; not yet reviewed by a person.

[…] this: you are comparing two frameless shower options and one page gives you exact glass thickness, hinge style, and cleaning advice, while the […]
[…] a broader care routine, this page sits under the frameless shower glass cleaning and maintenance hub. You can also see the related glass cleaning guide and maintenance […]